I have been looking
for a better way to store my nail polishes. I have a collection of 54 bottles
(judge me if you want) and they don’t fit on the shelf that they were on as
well as I’m moving and can’t take the shelf with me. So I searched for a DIY
project to make your own nail polish staircase and found this video by gurl.com
https://www.youtube.com/watch?v=_WlXNymASck
this seemed to be the best tutorial/instructions out there but it wasn’t big
enough for all my polishes and it was in inches. So I modified the instructions
and this is what I did to create by nail polish start case.
Tools:
Foam board (I got
mine form warehouse stationery)
Craft knife +
cutting board
Pencil
Super glue
Step 1:
Cut out 2
rectangles of foam board 40 x 15 cm for the base and back of the stair case
Step 2:
Cut out the steps
that the nail polish will sit on. Each step decreases in length by 3 cm so cut
out:
A 40 x 12 cm rectangle
A 40 x 9 cm rectangle
A 40 x 6 cm rectangle
A 40 x 3 cm rectangle
Step 3:
Cut out 8 legs for
the steps. Each one 40 x 2.5 cm
Step 4:
Glue the base and
back together to form an L shape
Step 5:
For each step glue
a leg on either side of it to create table shaped pieces
Step 6:
Starting with the largest
step. Glue this to the L shaped base and back
Then glue each
smaller step on top of the previous step
Step 7:
Once the glue is
dry put all your nail polishes on it and you’re done
Each row in my staircase
holds 13- 14 nail polishes therefore can hold approximately 65 polishes in
total so I have room to grow. The staircase sits nicely on my dresser and looks
tidy. This is a worthwhile DIY and it only cost me $18 (that’s NZD by the way)
UPDATE
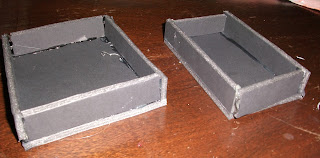
So I had some foam
board left over that’s just been sitting around and there were some cavities in
the sides of the stair case so I decided to make some draws to go on the sides.
Step 8:
Measure the length
of the cavity and cut a piece of foam board into a rectangle with side length
slightly smaller than this with depth of your choice (I did 10cm deep) for the
base of the draw.
Step 9:
Measure the height
of the cavity and cut a piece of foam board into a rectangle of a height 7mm
smaller than and length of the rectangle dimensions this for the sides of the
draw.
Step 10:
Glue theses
together to form a box with hot glue or super glue ( I used hot glue) and glue
a large bead to the front for the handle
Step 10:
Repeat steps 8-10 if
you want more draws.
step 11:
glue a long thin piece of foam board to the front of your stair case to prevent polishes sliding forwards.
Step 12:
Slot draws into the
cavity and you have a completed nail polish stair case with draws.


No comments:
Post a Comment